![7 Pro Tips How to Sharpen a Fillet Knife for Clean Cuts [2025]](https://kitchenpluse.com/wp-content/uploads/2025/09/7-Pro-Tips-How-to-Sharpen-a-Fillet-Knife-for-Clean-Cuts-2025-1024x536.webp)
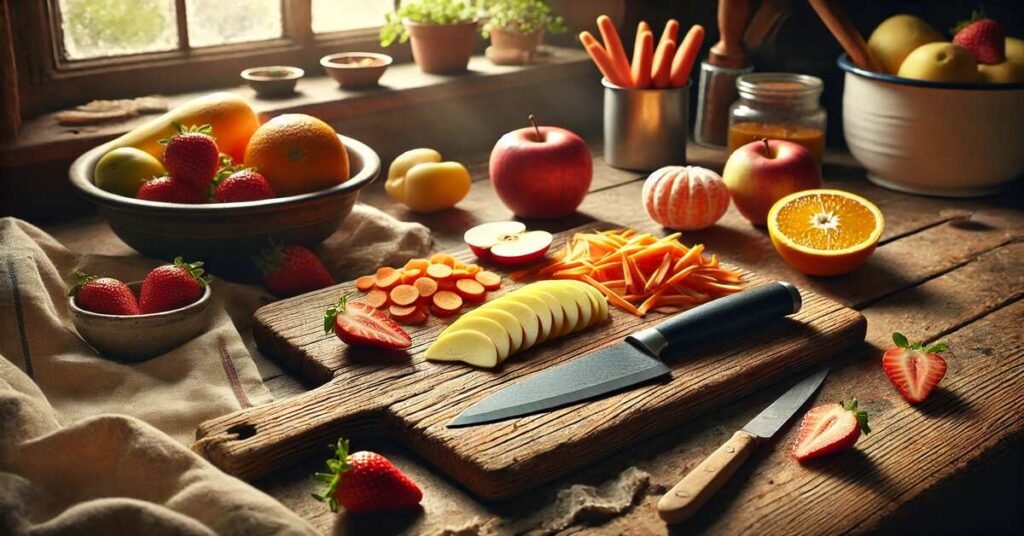
The first time I tried to fillet a salmon with a dull fillet knife, it went badly. The blade bent, the fish tore apart, and dinner turned into a mess. That night I learned something important: knowing how to sharpen a fillet knife is just as important as owning one.
In this step-by-step fillet knife sharpening guide, I’ll share what I’ve learned from my own kitchen. You’ll see the right sharpening angle (15°–20°), simple tools like whetstones, honing rods, and electric sharpeners, and how to avoid common mistakes.
Whether you cook at home in the U.S. or sharpen your knife outdoors on a fishing trip, keeping your blade sharp is a kitchen essential. A sharp knife saves time, improves safety, and makes every meal easier and more enjoyable.
Quick Answer: how to sharpen a fillet knife
The best way to sharpen a fillet knife is with a whetstone at a 15°–20° angle. Use light, steady strokes so the flexible blade doesn’t bend. Always finish with a fine grit (3000–8000) for a polished edge. Finally, test sharpness on paper or tomato skin—a sharp knife should glide, not tear.
What Makes a Fillet Knife Unique?
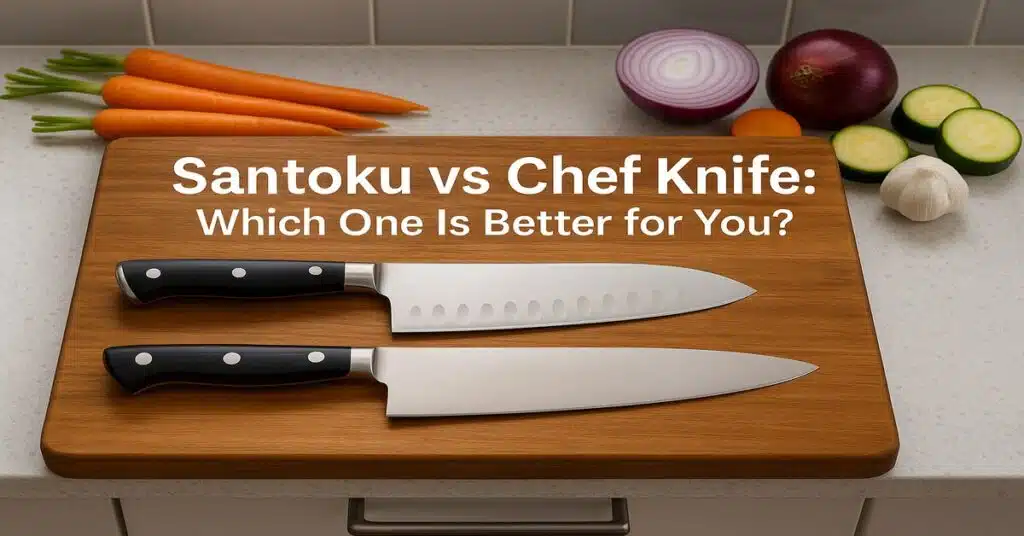
So, what is a fillet knife and how does it differ from other kitchen knives? A fillet knife has a thin, narrow, and flexible blade. This design makes it perfect for fish filleting and other delicate tasks like trimming meat. You can slide the blade close to the bones and remove skin without tearing the flesh.
However, this flexibility also creates a challenge. Unlike a Chef’s Knife or a Utility Knife, a fillet knife bends easily. If you don’t hold the right sharpening angle, the blade can lose its edge quickly.
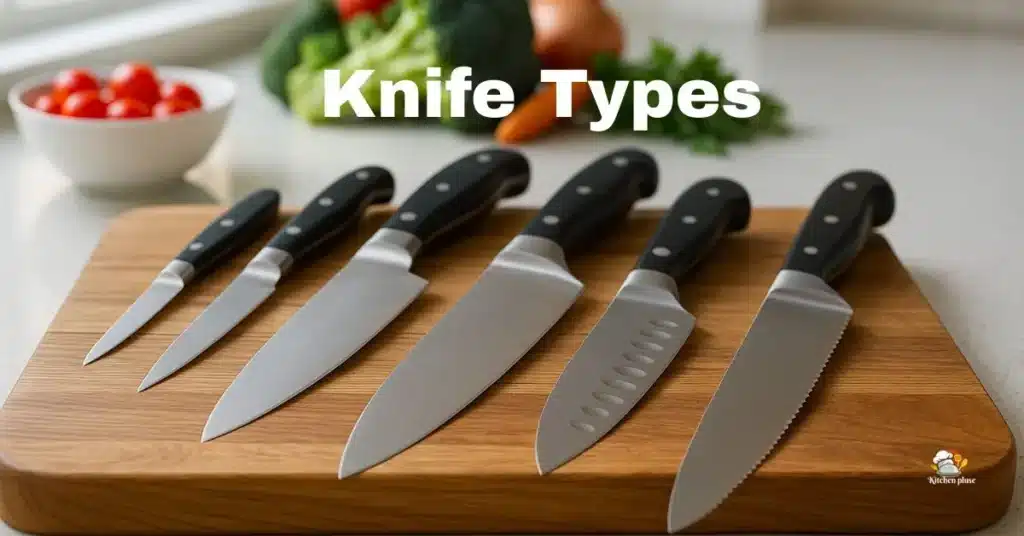
Knife Types and Their Uses:
| Knife Type | Blade Style | Best For |
| Fillet Knife | Thin, flexible, narrow | Fish filleting, skinning, delicate cuts |
| Boning Knife | Rigid, narrow | Removing bones from meat |
| Chef’s Knife | Wide, sturdy | Everyday chopping and slicing |
| Utility Knife | Medium, versatile | General kitchen tasks |
| Sushi Knife (Yanagiba, Deba) | Long, razor-sharp | Japanese-style slicing, sushi prep |
In many American kitchens, fillet knives are especially popular for preparing fish like salmon, trout, or bass. Sushi knives, on the other hand, are often used in Japanese cooking for precision slicing.
Personal Tip:
When I first tried sharpening my fillet knife, I pressed as hard as I would with a chef’s knife. The result was a bent blade and an uneven edge. Since then, I’ve learned to use a lighter touch and a sharpening angle guide to keep the blade consistent.
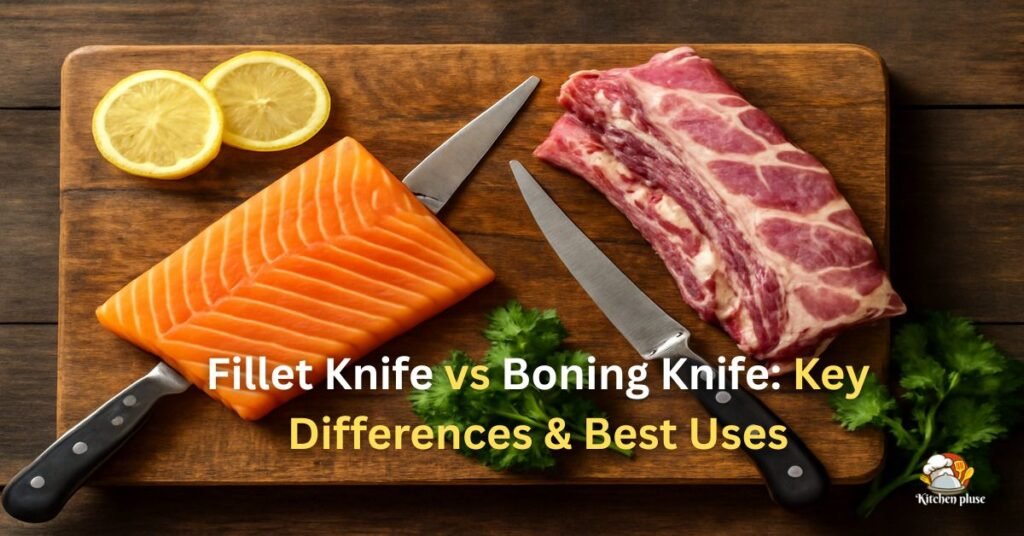
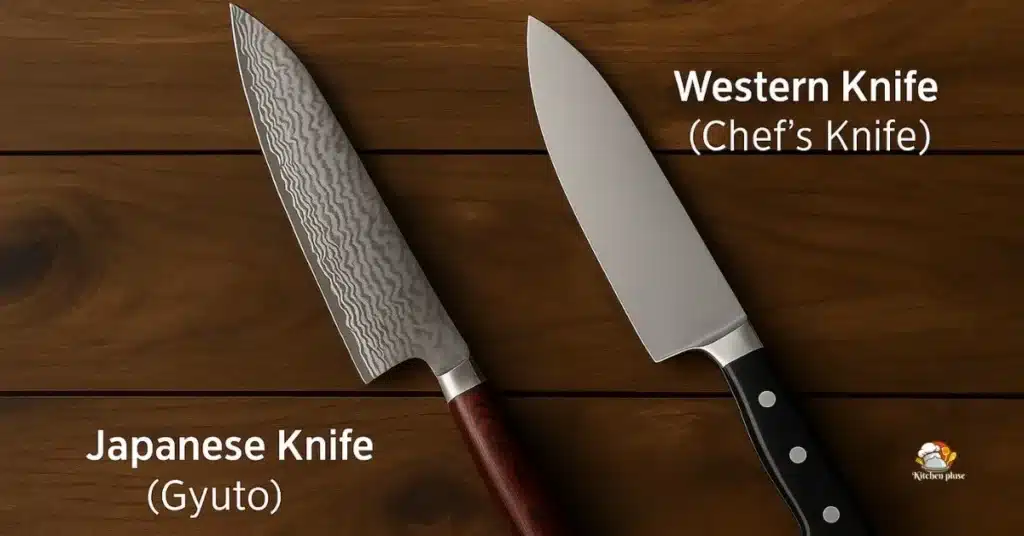
Unlike a Chef’s Knife or Boning Knife, a Fillet Knife has a thin, flexible blade designed for precision. For a full comparison, check my guide on [Fillet Knife vs Boning Knife: Key Differences & Best Uses 2025].
Why a Sharp Fillet Knife is Important
So, why sharpen knives and what are the benefits of a sharp fillet knife? A sharp blade helps you cook safely, cut faster, and keep your tools in good shape.
- Safety: A dull knife forces you to push harder. This raises the risk of slipping and cutting yourself. A sharp knife needs less pressure, so you stay safer.
- Cleaner Cuts: Sharp edges glide through fish fillets and delicate meat preparation. For example, salmon or trout fillets stay smooth instead of tearing.
- Time-Saving: Sharp knives cut quickly and cleanly. In busy U.S. kitchens or on outdoor fishing trips, this means less prep and more time enjoying your meal.
- Edge Retention and Flexibility: Regular sharpening keeps the blade flexible and strong. A well-sharpened knife bends without breaking and lasts much longer.
Personal Note: Before every fishing trip, I sharpen my knife. The difference is clear—I can fillet bass or salmon in half the time, and the flesh stays intact. It makes cooking easier and less stressful.
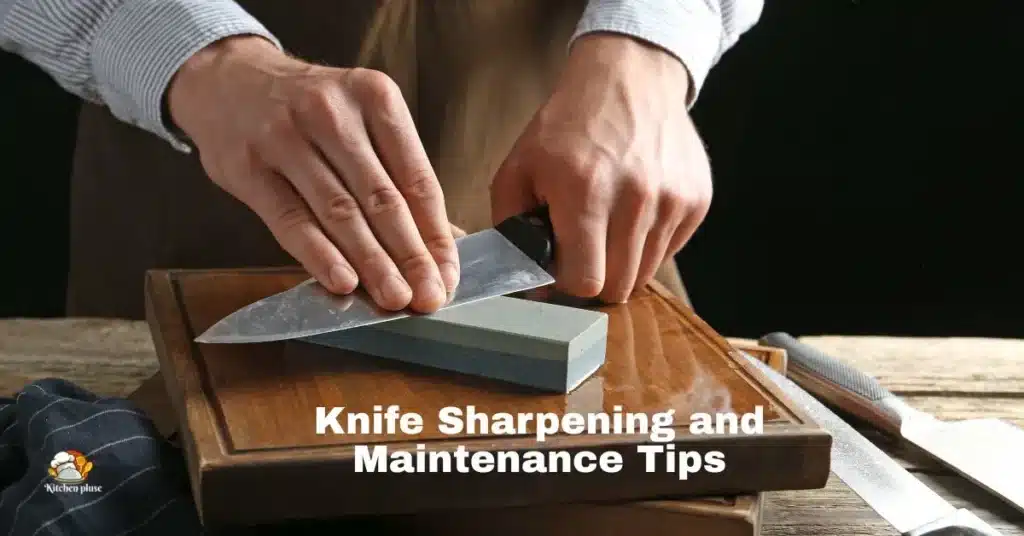
Tools You Need to Sharpen a Fillet Knife
Before you start, make sure you have the right fillet knife sharpening tools. Using the correct tools makes the process easier, safer, and more effective.
- Whetstone (Sharpening Stone): A classic choice that gives you the best control. It takes practice, but with the right angle, you can achieve a razor-sharp edge.
- Waterstone: Provides smooth sharpening and a polished finish. You need to soak it in water before use.
- Diamond Sharpening Stone: Very durable and sharpens faster than most stones. It’s great for frequent use, but it costs more.
- Honing Rod / Steel: Ideal for daily edge alignment. Remember, honing keeps the blade straight but does not fully sharpen it.
- Manual Knife Sharpener: Compact, simple, and beginner-friendly. Good for quick touch-ups in home kitchens.
- Electric Knife Sharpener: Fast and convenient. In the U.S., trusted brands like Work Sharp and Lansky are popular. Avoid cheap sharpeners that can grind away too much steel.
- Sharpening Angle Guide: Helps you maintain the correct 15°–20° angle consistently while sharpening.
- Safety Gloves: Protect your hands, especially when working with flexible fillet knives or slippery fish.
Comparison of Sharpening Tools:
| Tool Type | Pros | Cons |
| Manual (Whetstone, Waterstone) | Precise, traditional, long-lasting | Takes more time and practice |
| Electric Sharpeners | Fast, easy to use, consistent results | Low-quality ones can remove too much steel |
| Diamond Stones | Durable, quick results, less wear over time | Higher cost, less forgiving for beginners |
Personal Tip:
At home, I use a whetstone for full control and a polished finish. But when I go fishing in the U.S., I carry a manual pocket sharpener. It’s light, easy to pack, and keeps my fillet knife sharp enough for trout or bass.
Choosing the Correct Sharpening Angle
So, what is the best angle to sharpen a fillet knife? The ideal range is 15°–20°. This range gives your knife a razor-sharp edge while keeping enough blade flexibility for delicate cuts.
What Happens if the Angle is Wrong?
- Too Steep (over 20°): The edge becomes thick and may chip during cutting.
- Too Shallow (under 15°): The blade feels sharp at first, but it loses sharpness quickly and may tear the fish.
How to Keep the Right Angle:
To maintain balance, use a smooth stroking technique across the stone. Always keep the same angle. Look for burr formation on the opposite side of the blade—this is a clear sign the edge is sharpening evenly.
Practical Tip:
At home, I use a sharpening angle guide to stay consistent. Outdoors, I imagine stacking a dime under the blade to reach about 15°. This simple trick works well for beginners in U.S. kitchens too.
Step-by-Step Guide: How to Sharpen a Fillet Knife
Here’s how to sharpen a fillet knife step by step. Follow these simple stages to get a sharp, flexible edge every time.
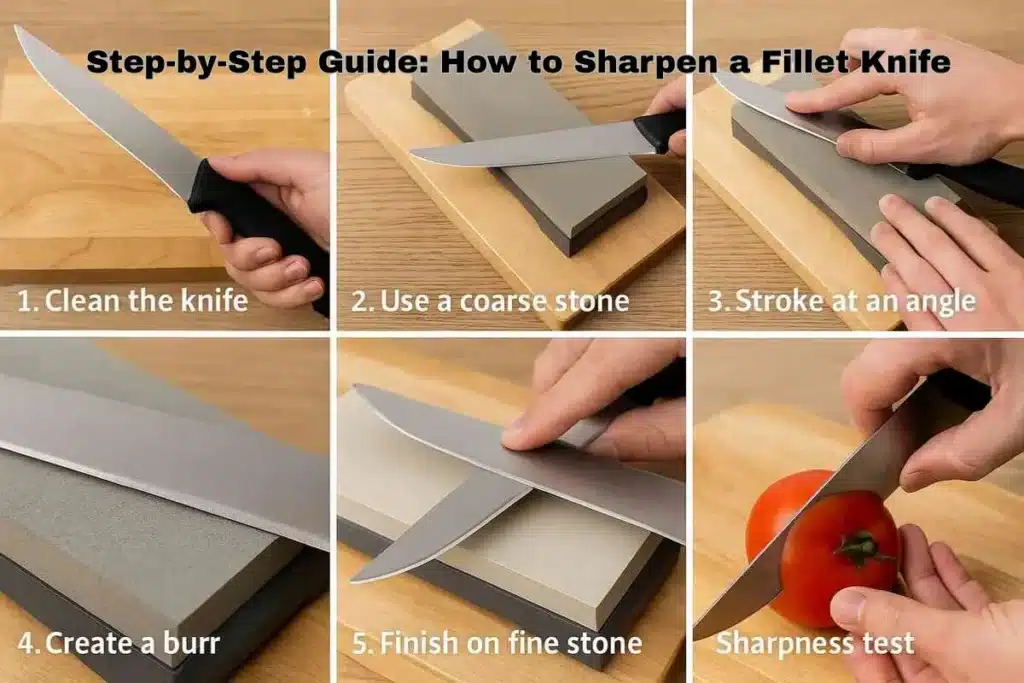
Step 1: Clean the Knife:
First, wipe away residue, fish oils, or rust. A clean blade sharpens more evenly and prevents grit from scratching the steel. For U.S. home cooks, warm water and mild soap usually work best.
Step 2: Select the Right Grit:
Next, choose the right sharpening stone:
- 1000 grit (coarse): Best for reshaping very dull edges.
- 3000–6000 grit (medium): Ideal for routine sharpening.
- 8000+ grit (fine): Creates a professional-level polish.
Tip: I use a 3000/6000 waterstone at home for regular care. On fishing trips, I carry a diamond pocket sharpener. It’s light, quick, and works well for trout or bass.
Step 3: Maintain the Angle:
Hold your knife at a 15°–20° sharpening angle. Use a smooth stroking technique, drawing the blade from heel to tip across the stone. Keep the pressure light and steady. Beginners can use an angle guide to stay consistent.
Step 4: Form a Burr and Polish:
As you sharpen, feel for a burr formation on the opposite side of the blade. This small raised edge shows the knife is sharpening correctly. Flip the knife and repeat until the burr is gone, leaving a polished, razor-sharp finish.
Step 5: Test the Sharpness:
Finally, check your work with a quick test:
- Paper test: A sharp knife slices cleanly through paper.
- Tomato test: The blade should cut the skin without pressure.
- Fingernail test: The edge should catch lightly on your nail.
👉 A properly sharpened fillet knife should glide, not tear.
Honing vs Sharpening: What’s the Difference?
Many people confuse honing vs sharpening, but they are two very different parts of knife maintenance. Both are important if you want to keep your fillet knife sharp, flexible, and safe to use.

Key Differences:
| Action | Tool | Purpose |
| Honing | Honing Rod / Steel | Realigns the blade edge for smoother cuts (daily or weekly use) |
| Sharpening | Whetstone, electric sharpener, diamond stone | Restores the edge by removing metal and improving edge retention |
When to Hone vs When to Sharpen:
- Honing: Use a honing rod often—before or after cooking. It keeps the edge straight so your knife cuts smoothly.
- Sharpening: Do this less often, usually every few weeks. Use a whetstone, electric sharpener, or diamond stone when the knife no longer glides through food.
Personal Tip:
In my U.S. kitchen, I hone my fillet knife before preparing salmon. But I only sharpen it with a waterstone once or twice a month. This way, the blade stays sharp without wearing down too quickly.
Golden Rule: Hone often, sharpen occasionally.
Common Mistakes to Avoid
Even experienced cooks make mistakes when sharpening a fillet knife. Avoiding these errors will keep your blade sharp, safe, and long-lasting.
- ❌ Using the Wrong Angle: Sharpening above 25° ruins the edge. Always keep your knife between 15°–20° for balance and flexibility.
- ❌ Pressing Too Hard: A fillet knife has a flexible blade. Heavy pressure bends or damages it. Use light, steady strokes instead.
- ❌ Skipping Fine Grit Polishing: Stopping after coarse grit leaves the edge rough. Always finish with 3000–8000 grit for a polished, razor-sharp blade.
- ❌ Relying on Cheap Electric Sharpeners: Low-quality machines often grind away too much metal. In the U.S., trusted brands like Work Sharp and Lansky are safer picks.
- ❌ Sharpening on the Wrong Surface: Never sharpen on glass or stone counters. Always use a proper cutting board—wood, bamboo, or high-quality plastic.
- ❌ Ignoring Rust Prevention: A wet or unclean blade can rust quickly. Always dry your knife fully and store it in a safe place.
- ❌ Not Using Safety Gloves: Skipping gloves is risky, especially with slippery fish. Wear cut-resistant gloves to protect your hands.
Personal Tip:
I once tried sharpening my fillet knife in a hurry on a glass board. The result? A dull edge and scratches on the blade. Since then, I only sharpen on a bamboo board, and it makes all the difference.
Best Fillet Knife Sharpeners
If you are looking for the best fillet knife sharpener, here are some trusted options. These sharpeners are widely used in U.S. kitchens and during fishing trips. I’ve included both budget and premium picks so you can choose the right one for your needs.
Comparison Table:
| Product | Type | Price (USD) | Best For |
| Rapala Fillet Knife Sharpener | Manual | $10–$20 | Budget, fishing trips |
| Lansky Sharpening System | Guided kit | $40–$60 | Consistent angles |
| Work Sharp Knife Sharpener | Electric | $70–$120 | Fast sharpening |
| Wüsthof Precision Sharpener | Manual / pull-through | $30–$50 | Home kitchens |
| Shun Whetstone (1000/6000 grit) | Waterstone | $60–$80 | Professional polish |
| Victorinox Double-Stage Sharpener | Manual | $25–$40 | Everyday use |
| Zwilling J.A. Henckels Sharpener | Manual / pull-through | $30–$50 | Beginners in U.S. kitchens |
Pros & Cons :
- Rapala Fillet Knife Sharpener
✅ Low cost, great for fishing trips
❌ Less precise than whetstones - Lansky Sharpening System
✅ Guided angles help beginners
✅ Consistent results every time
❌ Slower than electric sharpeners - Work Sharp Knife Sharpener
✅ Very quick and efficient
✅ Perfect for busy U.S. kitchens
❌ Can remove more steel if misused - Wüsthof Precision Sharpener
✅ Compact, simple design
✅ Good for quick sharpening at home
❌ Not strong enough for very dull knives - Shun Whetstone (1000/6000 grit)
✅ Professional polish and sharpness
✅ Traditional waterstone style
❌ Requires soaking and practice - Victorinox Double-Stage Sharpener
✅ Affordable, reliable brand
✅ Easy for everyday cooks
❌ Won’t create ultra-fine edges - Zwilling J.A. Henckels Sharpener
✅ Trusted German brand
✅ Beginner-friendly and ergonomic
❌ Limited for pro-level sharpening
Personal Recommendation:
Based on my experience, the Lansky Sharpening System offers the best balance of precision and price. If you need speed, the Work Sharp Electric Sharpener is unbeatable. For professional chefs or anyone who values a fine polish, the Shun Whetstone is the clear winner.
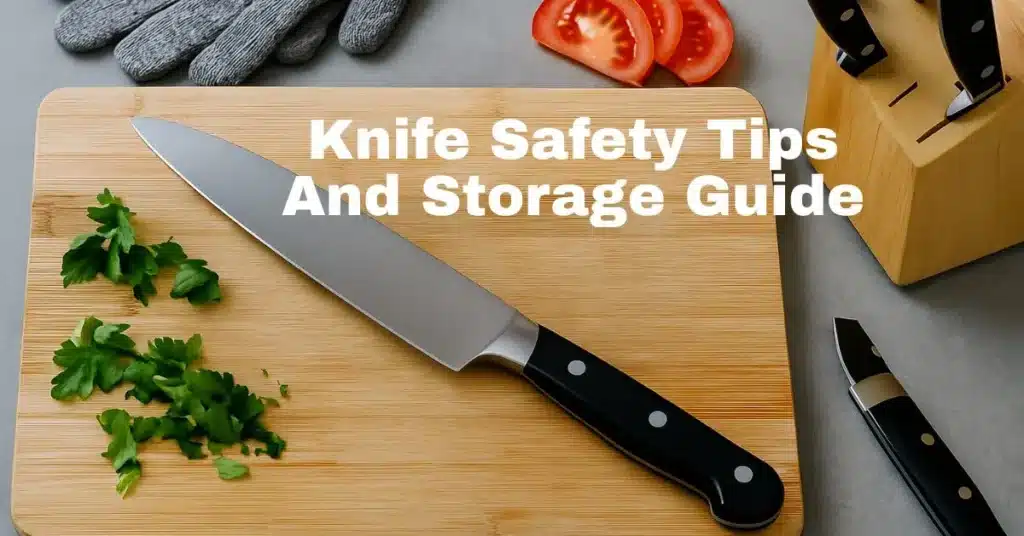
Fillet Knife Care & Maintenance Tips
Good care is just as important as sharpening. Follow these fillet knife care tips to keep your blade sharp and safe for years. These steps also count as knife maintenance after sharpening.
Rust Prevention:
Always dry your knife fully after washing. Even a little moisture can cause rust, especially after outdoor fishing trips. In U.S. kitchens, a soft towel works best.
Know Your Material:
Stainless Steel: Resists rust and requires less upkeep, but may lose its edge faster.
High-Carbon Steel: Holds a sharper edge longer, but needs oiling to prevent rust.
Oil Your Sharpening Stone:
Apply a few drops of mineral oil to your stone. This keeps the grit smooth, prevents clogging, and makes sharpening more effective.
Safe Knife Storage:
Store your fillet knife in a sheath, knife block, or on a magnetic strip. Never toss it in a drawer—this dulls the edge and increases the risk of accidents.
Safety First:
Always wear cut-resistant gloves when sharpening or filleting outdoors. The USDA food safety recommendations also highlight safe food handling and tool hygiene to prevent accidents
Personal Tip:
After sharpening, I wipe my fillet knife with a drop of food-grade mineral oil. It prevents rust and keeps the blade smooth—especially useful when storing the knife after a fishing trip.
Conclusion
A fillet knife is one of the most precise tools in any kitchen or fishing kit—but only if it stays sharp. By following this sharpen fillet knife guide, keeping the right angle (15°–20°), and using proper tools such as a whetstone, honing rod, or Work Sharp sharpener, you can keep knives sharp for years.
Whether you’re preparing salmon in your U.S. kitchen or filleting bass by the lake, sharpening is a skill worth learning. With practice, you’ll enjoy cleaner cuts, safer handling, and a knife that lasts much longer.
Personal Note:
Before every fishing trip, I sharpen my knife. The difference is immediate—filleting becomes faster, smoother, and far less frustrating. Try these steps yourself, and you’ll notice the results right away.
Frequently Asked Questions
What is the best way to sharpen a fillet knife?
The best way is to use a whetstone (sharpening stone). It helps you keep the correct angle, sharpen slowly, and extend the life of your knife.
What angle do you sharpen a fillet knife?
A fillet knife should be sharpened at a 15°–20° angle. This angle keeps the blade sharp while preserving flexibility, which is key for filleting fish.
How often should you sharpen a fillet knife?
If used regularly, sharpen every 2–3 weeks. For best results, use a honing rod before each use to keep the edge longer.
Can electric sharpeners damage a fillet knife?
Yes, some cheap electric sharpeners can grind away too much metal. But high-quality ones, like Work Sharp or Lansky, are safe and effective.
How do you sharpen a flexible fillet knife blade?
Use light pressure and keep a steady angle while moving the blade across the stone. Too much pressure can bend the flexible blade.
What grit stone is best for fillet knives?
It depends on the blade’s condition:
- 1000 grit (coarse): For very dull blades
- 3000–6000 grit (medium): For regular sharpening and polishing
- 8000+ grit (fine): For a razor-sharp, professional finish
About the Author:
MD Soazim is the creator of Kitchenpluse.com, where he shares easy guides on cooking tools and kitchen essentials. With years of hands-on experience in fish filleting and knife sharpening, he helps home cooks and fishing enthusiasts in the U.S. keep their knives sharp, safe, and ready for any recipe.